
- PCD Tools For Wood
- Replaceable Insert Router Bits
- CNC End Mill
- Cutter Head
- Woodworking Tools
- Industries Knives
- Carbide Burr
- Carbide Rotary Burr
- Tungsten Carbide Burr Bits
- Tungsten Carbide Burr Set
- Cylindrical Carbide Burr
- Long Shank Carbide Burr
- Double Cut Carbide Burr
- Flame Carbide Burr
- Cone Carbide Burr
- Burr Blanks
- Carbide Rods
- Tire Reamer Bit
- Tungsten Carbide End Mill
- Carbide Tire Studs
- Snow Tire Studs
- ATV Tire Studs
- Motorcycle Tire Studs
- Mining & Oiling
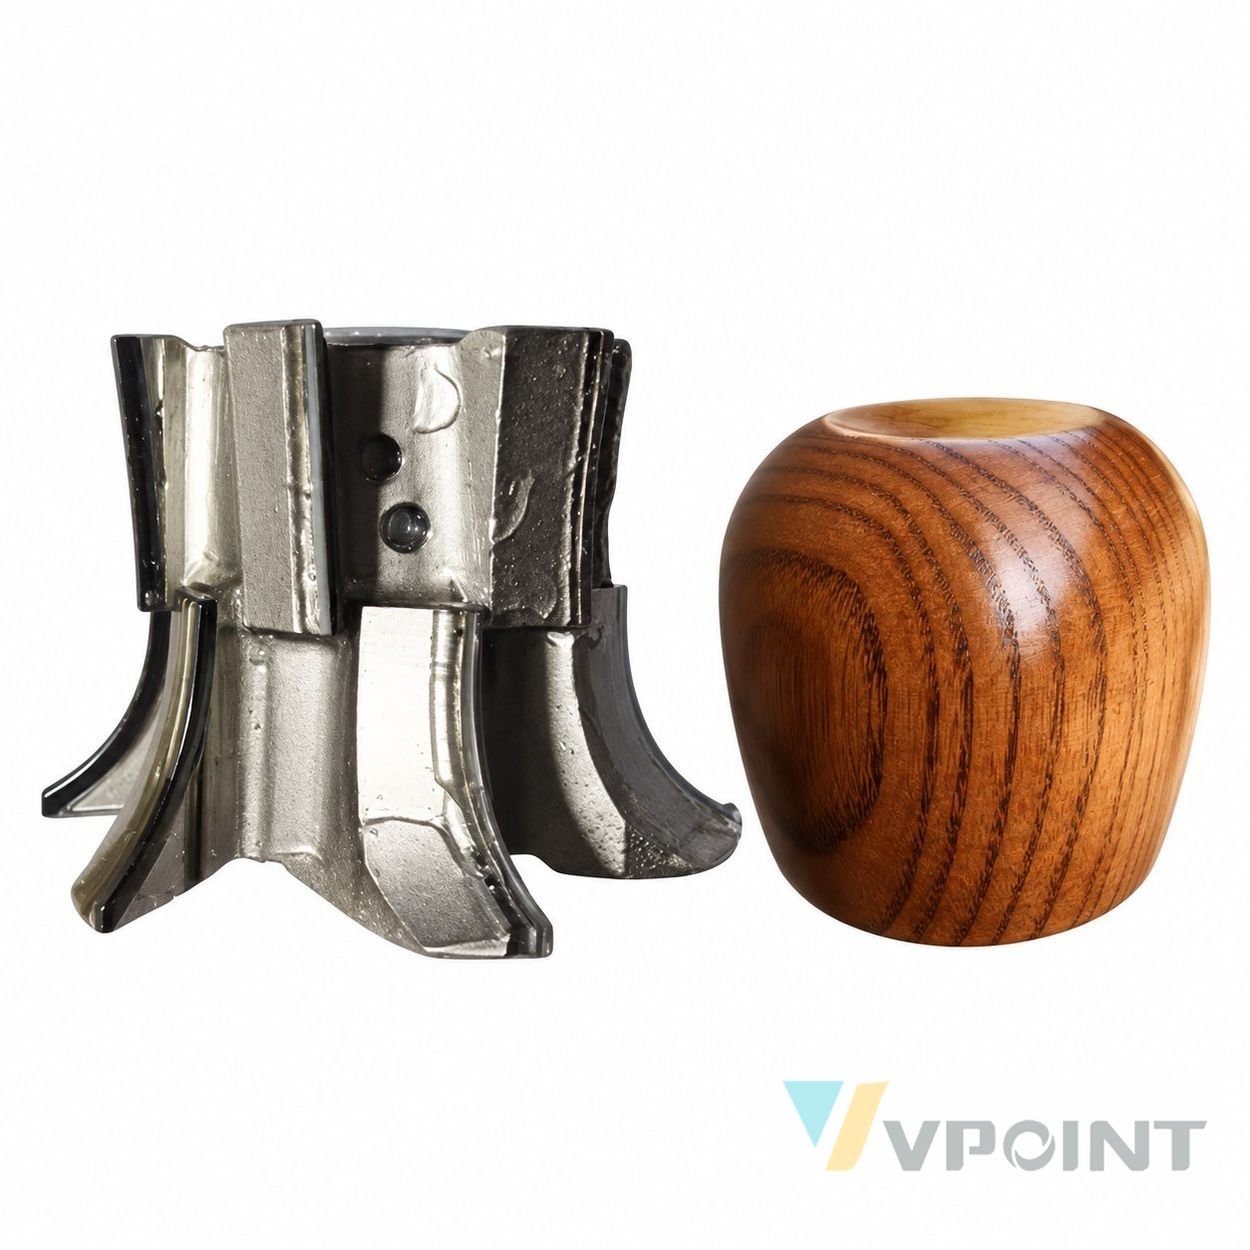
PCD Pen Barrel Cutter: Applications, Materials and Selection Notes

Workshop report from a real user thread. On the Axiom Precision forum, a surfacing run at about 16,000 RPM turned MDF progressively darker, and the operator could smell the burn before the pass was a third done.
What actually went wrong
Replies suspected a dull edge and a chip load that was too light, then identified the specific tool configuration as the cause.
How PCD Pen Barrel Cutter addresses this problem
Removing the bottom carbide cutters on that surfacing head, leaving the vertical knives, restored a pristine spoilboard: a setup fix, not just a sharper tool. The cutter profiles the barrel blank to the required round profile in matched passes on the profiling machine: the diamond edges shear the wood consistently across long production runs of pen barrels and round-wood workpieces.
Why this matters for a buyer: Abrasive sheet goods — MDF, fibre cement, laminated and prefinished panels — blunt ordinary carbide quickly. Every edge change interrupts a batch, and edge quality drifts as the tip wears, so the last panel no longer matches the first.
Hardness: the number behind the life
- Polycrystalline diamond measures roughly 6,500 to 10,000 HV on the Vickers scale, against about 1,000 to 1,800 HV for sintered tungsten carbide.
- On abrasive MDF and laminated board, field comparisons report 20 to 50 times the life of TCT carbide.
- A documented edgebander case logged about 32,000 linear metres between knife rotations on 18 mm MDF.
- The limits are real: PCD is brittle under impact and reacts with iron above about 700 degrees C, so it belongs on abrasive non-ferrous work, not steel.
Capability and specifications
The PCD pen barrel cutter machines wooden pen barrels and round-wood blanks on compatible profiling machines. The chart lists a 100 mm outside diameter with cutting heights from 40 to 100 mm, 30 mm bore (35 mm for the 80 mm height) and 6 teeth per configuration.
Specifications from the product page: The source specification lists the following confirmed configurations: Outside Diameter (mm) | Cutting Height H (mm) | Bore (mm) | Teeth | 100 | 40 | 30 | 6 | 100 | 50 | 30 | 6 | 100 | 60 | 30 | 6 | 100 | 70 | 30 | 6 | 100 | 80 | 35 | 6 | 100 | 100 | 30 | 6 |
Which machines this tool is built for
Machine choice changes the result more than most operators expect. The same tool on a rigid spindle with a power feed behaves differently from the same tool fed by hand: chip load, heat and finish all shift. The table below states where this tool is the right choice, what it actually delivers there, and where it should not be used.
| Machine | Fit | What you get | Key limit |
|---|---|---|---|
| CNC nesting router | Recommended | Constant high RPM and programmed feed suit PCD. The tip holds its edge through abrasive board, so edge quality does not drift across a shift. | Needs effective extraction and a rigid machine; impact on a clamp or stop chips the tip. |
| Edge bander (premill / fine trim) | Recommended | PCD premill and trimming heads are the standard for abrasive MDF and HDF edges, with long runs between interventions. | Tip offsets and copy shoes must be set to the panel thickness; a chipped tip shows immediately. |
| Panel sizing saw | Recommended | PCD saw blades keep tooth sharpness on fibre cement, HPL and prefinished panels far longer than carbide. | Never run a chipped tip; bore and flange must be clean and true. |
| Router table | Workable with limits | Small-diameter PCD straight bits work when RPM and feed are right, and the finish stays consistent on abrasive stock. | Hand-feed shock is the main risk: PCD is hard but brittle. |
| Hand-held router or trimmer | Not recommended | Side load and uncontrolled entry can chip a diamond tip, and the cost per tip is far higher than carbide. | Keep PCD for machine-fed operations with controlled engagement. |
Machine by machine: what to expect
CNC nesting router. Constant high RPM and programmed feed suit PCD. The tip holds its edge through abrasive board, so edge quality does not drift across a shift. Needs effective extraction and a rigid machine; impact on a clamp or stop chips the tip.
Edge bander (premill / fine trim). PCD premill and trimming heads are the standard for abrasive MDF and HDF edges, with long runs between interventions. Tip offsets and copy shoes must be set to the panel thickness; a chipped tip shows immediately.
Panel sizing saw. PCD saw blades keep tooth sharpness on fibre cement, HPL and prefinished panels far longer than carbide. Never run a chipped tip; bore and flange must be clean and true.
In short: if the work is repetitive and the machine is rigid, this tool is at its best. If the setup relies on hand control, expect the finish to depend on feed discipline rather than on the tool alone.
Typical production applications
- Nesting MDF and HDF parts on a multi-shift CNC line.
- Panel sizing of melamine, HPL and prefinished board.
- Edge banding premill and fine trim on abrasive MDF edges.
- Fibre-cement and composite sheet cutting, where carbide dulls quickly.
Each of these is a repeated operation, which is where consistency matters more than a single good test cut: the first part and the five-hundredth part have to match.
Installation, step by step
- Isolate the power first. Unplug the router, or remove the battery pack on a cordless machine, before touching the collet. A machine that cannot start cannot injure a hand.
- Clean the collet and the shank. Wipe resin and dust from the collet taper and from the full length of the shank with a solvent-damp cloth. A contaminated collet cannot clamp evenly, and uneven clamping is the root of most runout complaints.
- Match the collet to the shank exactly. 6 mm, 6.35 mm (1/4 in), 12 mm and 12.7 mm (1/2 in) are different sizes. Never shim a small shank into a large collet, and never rely on a worn collet to hold a nominal size.
- Seat the shank fully, then back off 1/16 in. Push the bit in until it bottoms out, then withdraw it about 1/16 in (1.6 mm). This leaves room for shank expansion and stops the bit freezing in the collet.
- Keep enough shank engaged. Aim for at least three quarters of the shank length inside the collet. A bit gripped only near the tip will slip, chatter or break at the collet mouth.
- Tighten with two wrenches, firmly but not brutally. Hold the spindle and turn the collet nut. Over-tightening stretches the collet and reduces its grip next time; under-tightening lets the bit creep down during the cut.
- Check runout before the first cut. Spin the spindle by hand and look for wobble, then run the tool in free air and listen. Any visible wobble means re-seat the bit, not run it in.
Two rules cover most of the risk: the shank or bore must be clean, and the tool must be seated with enough engagement. Everything else, torque, projection, guard clearance, is a check on those two.
Installation mistakes that cause most failures
- Shank inserted only halfway Contact area drops, vibration rises, and the bit can slip or be ejected. Seat the full shank, then back off 1/16 in.
- Shank bottomed out in the collet There is no room for expansion, clamping force becomes uneven, and the bit can freeze so tightly that it cannot be removed.
- Dirty or resin-coated shank The classic cause of a rippled wall and chatter: the bit runs off-centre no matter how hard the nut is tightened.
- Worn collet kept in service Concentricity is lost permanently. No amount of torque restores it, and the tool starts breaking at the collet mouth.
- Over-tightening the collet nut Stretches the collet and deforms it, which reduces grip on every tool fitted afterwards.
- Excessive overhang or an unnecessarily long cutting edge Length compounds vibration and deflection, and deflection is a leading cause of tool breakage. Use the shortest cutting edge that does the job.
- A large-diameter bit run at full speed Mass and RPM together create vibration and imbalance. Respect the diameter and RPM limit for the tool.
Rules during the cut
- Never start the spindle with the tool touching the workpiece. Let it reach full speed first, then enter the cut.
- Feed against the direction of rotation. Feeding with the rotation climbs the work and invites a kickback.
- Take shallow passes. Depth per pass should suit the tool diameter, the material and the machine rigidity.
- Watch the chips. Chips mean the edge is cutting; fine dust means it is rubbing, and heat is building.
- Keep extraction running for the whole cut. Recut chips are the fastest way to bake resin onto a flute.
- Stop the moment the sound changes. A new squeal or knock is cheaper to investigate than a broken tool or a scrapped panel.
- Do not reach near the tool until the spindle has fully stopped.
Maintenance and inspection schedule
| Interval | What to do |
|---|---|
| Every shift | Wipe resin from the flutes and the shank with solvent and a soft brush. Inspect the cutting edges under a light for chipping, a bright wear land or blue heat marks. Check that the collet or flange is clean before mounting. |
| Weekly | Check runout with a dial indicator against the toolmaker limit. Inspect the collet for scoring or ovality and replace it if marked. On bearing-guided tools, check the bearing for wobble and free rotation. Verify extraction airflow at the hood. |
| Monthly | Review the tool log by tool number: metres cut, material, and any change in finish or feed force. Send the tool for resharpening when finish drops or feed force rises, not on a calendar date. Replace worn collets and damaged screws as consumables. |
Inspect with a 10x magnifier in good light. What to look for: a chipped or flaked corner, a bright wear land running back from the edge, cracks at the joint between carbide and steel body, blue or straw discolouration from heat, and resin filling the flute. On a mounted tool, a dial indicator on the shank or body shows runout, and a test cut in scrap shows the result that matters.
When to stop using a tool: any visible crack, a chipped cutting corner, a bent shank or a body that has been run hot is a removal, not a touch-up. A tool that has lost its edge can be resharpened; a tool with a crack cannot be made safe.
Why tools break, chip or deform
Nearly every failure has a setup cause rather than a manufacturing cause. The table maps the symptom an operator sees to the mechanism behind it and the correction that actually removes the cause.
| Symptom | Most likely cause | Correction |
|---|---|---|
| Tool snaps at the collet mouth | Too much overhang, an unnecessarily long cutting edge, or a worn collet that lets the tool flex. | Shorten the overhang, use the shortest cutting edge that suits the job, replace the collet, and reduce depth per pass. |
| Tool creeps down or pulls out mid-cut | Shank bottomed out in the collet, or oil and dust on the shank reducing friction. | Seat fully then back off 1/16 in, clean the shank and collet with solvent, and re-torque. |
| Chatter and a rippled wall | Worn or wrong-size collet, debris in the taper, or a machine spindle with runout. | Replace the collet, clean the taper, check spindle runout, and reduce depth per pass. |
| Chipped corner on the carbide | Impact with a fastener, a hard knot or a glue line, or a tool dropped on the bench. | Inspect stock and use metal detection, store the tool in its case, and keep a spare for the finishing pass. |
| Burn marks and resin build-up | Feed too slow for the RPM, a dull edge, or poor extraction. | Raise feed or lower RPM, clean the resin off, and restore extraction before the next batch. |
| Blue shank or discoloured tip | Heat from forced feed, packed chips or no extraction. | Reduce depth per pass, clear chips, and treat a discoloured tool as worn, not just dirty. |
| Vibration immediately after mounting | Bent shank, damaged collet, or an unbalanced large-diameter tool run too fast. | Check runout with a dial indicator, replace the collet, and respect the diameter and RPM limit. |
Where it wins, and where it does not
Advantages: Wooden pen barrel machining Round-wood blank profiling Round component production Profiling machine production runs
Limitations, stated honestly: MDF, HDF, fibre cement, laminated board, prefinished panels and veneered plywood. Not for ferrous metals, stone, or impact-prone work with nails and hard inclusions — PCD is hard but brittle.
Machining characteristics and performance
Standard reference values for guidance only — always adjust to machine rigidity, clamping and tool wear, and confirm on the actual workpiece. Material | Typical spindle speed | Typical feed | Notes | MDF | 20,000–24,000 rpm | 8–12 m/min | PCD V-edges hold the 60° angle on abrasive MDF | particleboard | 18,000–22,000 rpm | 8–12 m/min | Grit-resistant diamond edges |
All published parameter values are standard reference values for guidance only. Confirm them against your tool, spindle and workpiece before a production run.
Compared with the alternative
Compared with standard carbide, PCD tips hold a sharp edge far longer on abrasive panels; compared with a disposable blade, they cost more up front but lower cost per metre in long runs.
From the product comparison section: This tool is a PCD (polycrystalline diamond) cutter. Tungsten carbide is the conventional alternative. Typical industry data: Property | Tungsten Carbide Cutter | PCD (Diamond) Cutter (This Tool) | Hardness | 1,500-2,000 HV | 7,000-9,000 HV | Best suited for | General profiling across mixed materials | Highly abrasive boards and long production runs | Tool life vs. carbide baseline | 1x (baseline)…
Materials and machine fit
Materials it cuts: Wooden pen blanks Round-wood stock Selected hardwoods Wood-based round workpieces
MDF, HDF, fibre cement, laminated board, prefinished panels and veneered plywood. Not for ferrous metals, stone, or impact-prone work with nails and hard inclusions — PCD is hard but brittle.
Machine fit: Panel sizing saws, edge-banding lines (premill and fine trim), CNC nesting routers and multi-spindle machines with the correct bore or toolholder. Hand-held routers only where the shank and RPM are confirmed.
Frequently asked questions
The chart lists 100 mm diameter cutters with 40-100 mm cutting heights, 30 mm bore (35 mm for the 80 mm height) and 6 teeth.
The answer depends on the workpiece and the machine setup. The specification table on the product page is the starting point, and our engineers can confirm it against your machine on WhatsApp.
Machining wooden pen barrels and round-wood blanks on compatible profiling machines.
Use the parameter table as a reference and verify on a test cut before a production batch.
Can I use this tool in a hand-held trimmer?
Yes, within the limits in the machine table: keep the cut light and the tool small enough for the base.
How deep should the shank sit in the collet?
Insert it until it bottoms out, then withdraw about 1/16 in (1.6 mm), and keep at least three quarters of the shank length gripped. That leaves room for expansion and prevents the tool freezing in the collet.
Why did my previous bit break at the shank?
The usual combination is too much overhang with a collet that no longer holds concentric. Deflection at the collet mouth fatigues the shank until it snaps. Shorten the overhang, replace the collet and reduce depth per pass.
How often should it be sharpened?
By symptom, not by calendar: when surface finish drops, feed force rises, or the chips turn to dust. Send the tool for service with its tool number so the log stays usable.
Sources and standards
Case source: Axiom Precision Forum. "Burned spoilboard during surfacing." axiomprecision.proboards.com/thread/998. Accessed 10 Nov. 2026.
Amana Tool. "Knowledge Base: shank concentricity, collet installation, vibration and sharpening." www.amanatool.com/knowledge_base. Accessed 10 Nov. 2026.
Amana Tool. "Safety Guidelines for Router Bits and Saw Blades." www.amanatool.com/safety. Accessed 10 Nov. 2026.
C.M.T. Utensili. Router bit instruction sheet: collet seating, feed rate and maintenance guidance. Accessed 10 Nov. 2026.
TDT Diamant. "PCD tools in comparison: advantages over carbide and CVD." www.tdt-vertrieb.de. Accessed 10 Nov. 2026.
Litian Century Diamond Tools. "PCD inserts vs cermet vs carbide vs CBN." www.ltctdiamonds.com. Accessed 10 Nov. 2026.
Standards: ISO 9001 · UNSPSC · eClass
Full specifications for PCD Pen Barrel Cutter · Resources hub · Ask a VPOINT engineer on WhatsApp →